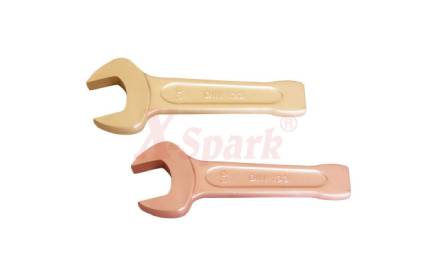
The aluminium bronze alloy wrench is the most commonly used hand tool for explosion-proof tools.
Special tool high-neck tapping wrench (percussion wrench) is suitable for petroleum, chemical, metallurgy, power generation, oil refining, shipbuilding, petrochemical, machinery and other industries. It is an essential tool for equipment installation, device and equipment maintenance, and repair work. Percussion wrenches are divided into metric and imperial systems.
The material of the high-neck striking open wrench is made of 45 # medium carbon steel or 40Cr alloy steel as a whole forging process.
Although it is an explosion-proof tool, you should also pay attention to it when you use it: explosion wrench cannot be used with excessive force, and you cannot use sleeves or tie other metal rods to lengthen the arm, and hit with a hammer (except for knock wrench ) Method is used for screw fasteners.

Striking Open Wrench
The material of the explosion-proof copper wrench is divided into two types: aluminium bronze and beryllium bronze. Among them, the aluminium bronze material has a working surface hardness of above HRC 25 ° and a tensile strength δ b> 75-85kgf / mm2. All other technical indicators have reached the advanced level of similar foreign products. Continuous use in the flammable gas ethylene (concentration 7.8%) space ensures safety, and impact (collision), friction, and falling hammers do not produce spark explosions.
The process of using the hammer drill chuck is as follows:
1. First, remove the sludge on the surface of the broken bolt, use the centre gun to kill the centre of the section, and then use an electric drill to install a drill with a diameter of 6-8 mm to drill the hole in the centre of the section. Note that the hole must be drilled through. After the hole is drilled through, remove the small drill bit, replace it with a 16 mm diameter drill bit, and continue to enlarge and drill through the hole of the broken bolt.
2. Take a welding rod with a diameter of 3.2 mm or less, use a small and medium current to build a weld from the inside to the outside of the drill hole of the broken bolt, and take the half of the entire length of the broken bolt at the beginning of the build-up welding. Too long, so as not to burn the outer wall of the broken bolt. After surfacing to the upper-end surface of the broken bolt, continue to surfacing a cylinder of 14-16 mm in diameter and 8-10 mm in height.
3. After surfacing welding, hammer the end face of the hammer with a hand hammer to make the broken bolt vibrate along its axis. Due to the heat generated by the previous arc and subsequent cooling, plus the vibration at this time, the broken bolt There is looseness between the threads of the body.
4. After welding, let it cool, use a plum blossom wrench to wrap around the nut and twist it back and forth. You can also tap the end of the nut with a small hammer while twisting back and forth so that the broken bolt can be taken out.
5. Carefully observe that when a small number of rust leaks from the fracture after tapping, you can take the nut of M18 and put it on the stud of the surfacing, and weld the two together.